Icon Swaps Rewards & Token Tracker for February (Full Guide)


Staying on top of Icon Swaps in February can be the difference between an average squad and a truly meta-defining Ultimate Team. This guide collects everything you need to know about Icon Swaps rewards, how to track your tokens efficiently, and where to get the best value from your hard‑earned objectives.
- Icon Swaps February Overview
- How the Icon Swaps Token System Works
- February Icon Swaps Token Tracker
- Best Icon Swaps Rewards & Recommended Choices
- How to Grind Icon Swaps Objectives Efficiently
- How ItemD2R & FIFA Coins Fit Into Your Progression
- Advanced Tips, Strategy & Squad Building
- FAQ: Icon Swaps February
Icon Swaps February Overview
Every Icon Swaps campaign gives players a limited-time chance to unlock some of the best historical players in the game, along with high-value packs. February is typically a key month: content cycles are in full swing, promos are stacked, and Icon Swaps tokens can significantly accelerate your club’s progress.
In February’s rotation, you’ll again earn untradeable Icon Swaps tokens through specific objectives. These can be redeemed for:
- Individual Icon player picks or guaranteed Icon packs
- High-value packs such as 83+ x25 or 84+ x20
- Mixed options combining packs and specific Icons
Because you can’t unlock everything, understanding the value of each reward and tracking your tokens is crucial. This guide will help you make those choices with confidence.
How the Icon Swaps Token System Works
The Icon Swaps system is straightforward on paper, but optimizing it takes planning. Here’s how it works at a high level:
Tokens Explained
Icon Swaps tokens are special untradeable items you unlock via objectives. Each token can be submitted into SBCs (Squad Building Challenges) dedicated to Icon Swaps rewards.
Key points:
- Each token has a strict availability window.
- Tokens are usually earned in online modes, Squad Battles, or Live FUT Friendlies with squad restrictions.
- Once you submit a token into an SBC, it’s gone for good – there are no refunds.
Rewards Structure
Rewards are tiered by the number of tokens required. Low-tier rewards (1–4 tokens) are often upgrade packs or small fodder packs, mid-tier rewards (5–10 tokens) are big pack drops or mid/prime Icon packs, and high-tier rewards (10+ tokens) are reserved for top Icons or premium pick options.
A typical distribution might look like:
- 2–4 tokens: 83+ x10 or similar fodder packs
- 5–8 tokens: 83+ x25 packs or mid Icon packs
- 9–12 tokens: prime Icon packs or Icon player picks
- 13+ tokens: top-tier Icon player picks or special versions
February Icon Swaps Token Tracker
Managing Icon Swaps across the entire February window can get messy, especially if you play on and off. A token tracker keeps you from missing rewards or losing track of which objectives you’ve already completed.
Token Availability & Deadlines
Each February Icon Swaps token is tied to a specific objective group or promo section. Typically, you’ll see:
- Squad Battles tokens: Offline grind, often linked to using players from certain leagues or nations.
- Live FUT Friendlies tokens: Feature special rule sets like One League, Silver Lounge, or specific chemistry conditions.
- Rivals or Champs tokens: Reward more dedicated players for playing competitive modes.
Remember to check the in-game objective timers. Many February tokens are available only for a few weeks, and late February often overlaps with other promos, making your time management critical.
Sample Token Checklist for February
While exact objectives depend on the current game cycle, a practical way to track your progress is to maintain a checklist. For example:
- Token #1 – Squad Battles: Win 6 matches on at least Semi-Pro with 11 players from League A.
- Token #2 – Squad Battles: Score in 10 separate matches with players from Nation B.
- Token #3 – Live FUT Friendly: Win 6 matches in Mode X using only Gold players.
- Token #4 – Rivals: Play 10 matches with at least 7 first-owned players in your starting XI.
- Token #5 – FUT Champs: Win 5 matches in Weekend League.
Use a spreadsheet, note app, or even paper to mark each token as you collect it. This reduces stress and helps you plan which objectives to prioritize before deadlines.
Best Icon Swaps Rewards & Recommended Choices
Choosing the right Icon Swaps rewards in February depends on your playstyle, squad needs, and risk appetite. Below are the most common reward categories and who they are best for.
Big Packs vs. Specific Icon Players
Usually, the two main paths are:
- Big packs (83+ x25, 84+ x20, etc.) – High volume, excellent for SBC fodder and promo chasing.
- Specific Icons or Icon picks – Direct upgrade to your team if you get the right player.
If you love opening packs during February promos and you’re comfortable with RNG, the fodder packs offer a broad shot at meta cards. If your team is missing a key position and a particular Icon fits perfectly, target the player options.
High-Value Picks for February
Although individual lineups vary by cycle, some general rules for value stand out:
- Mid- to high-tier fodder packs are almost always good value early and mid-cycle, letting you complete other SBCs.
- Icon player picks tend to be better than straight Icon packs because you get a choice.
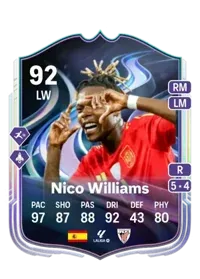
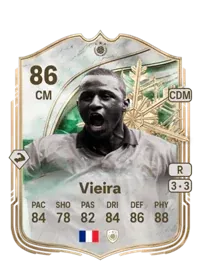
- Attacking Icons (strikers, CAMs, wingers) usually provide more noticeable impact than defensive Icons, unless you really lack a CB or CDM.
Consider your club’s depth. If you already have strong promo cards, you might go for a guaranteed top-tier Icon. If your club is thin, double down on fodder packs and use the output to complete multiple SBCs instead.
How to Grind Icon Swaps Objectives Efficiently
Icon Swaps can be a time sink, especially in February when multiple promos overlap. With a bit of planning, you can dramatically reduce the grind.
Stacking Objectives in Fewer Matches
Whenever possible, build squads that allow you to complete multiple objectives at once. For example:
- Use 11 first-owned players from the same league and nation to tick off two or more conditions simultaneously.
- Combine goal, assist, and clean sheet requirements in the same Squad Battles run.
- In Live FUT Friendlies, build a hybrid team that satisfies several Icon Swaps rule sets at once.
This approach can cut your total match count by 30–50%, freeing you up for Rivals, Champs, or other events.
Choosing Difficulty & Managing Your Time
Don’t overestimate the difficulty you need to play on for Squad Battles. If objectives allow Semi-Pro or Professional, play the lowest difficulty that still counts – it will speed up token collection massively.
Set mini-goals: for example, “2 tokens tonight, 3 tokens this weekend.” Breaking the grind into sessions keeps the process enjoyable and helps you avoid burnout late in the month when deadlines hit.
How ItemD2R & FIFA Coins Fit Into Your Progression
Icon Swaps are just one part of upgrading your Ultimate Team. Squad depth, chemistry links, and having the right players for restricted modes all influence how efficiently you can complete February’s objectives. That’s where a strong club foundation becomes important.
Platforms like ItemD2R focus on helping players optimize their clubs faster. By securing a stable budget of FIFA Coins, you can build meta-friendly squads for Icon Swaps objectives without having to rely purely on RNG from packs. For example, if an objective demands 11 players from a specific minor league or nation, purchasing a few affordable cards on the market becomes much easier when your coin balance is healthy.
Some players prefer to accelerate their progress with services dedicated to buying fifa ultimate team coins. When done responsibly and in accordance with the game’s latest policies, this approach can free you from endless trading and allow you to focus on what actually matters: playing matches, completing Icon Swaps objectives, and experimenting with tactics.
ItemD2R positions itself as a long-term partner for Ultimate Team enthusiasts, covering not just FUT coins but also currency and items in other titles. For Icon Swaps specifically, a strong coin foundation lets you:
- Quickly assemble full-themed squads (e.g., full league or nation teams) required by February objectives.
- Invest in supersubs and rotational players to handle multiple modes without constantly changing your core XI.
- Capitalize on market dips after lightning rounds or major promos, stocking up on fodder for SBCs.
The end result is a smoother, more flexible experience: instead of feeling forced to stretch a thin squad across Rivals, Champs, and Icon Swaps, you can rotate lineups freely and keep your gameplay fresh throughout the month.
Advanced Tips, Strategy & Squad Building for February
If you’re already comfortable with Icon Swaps basics, these advanced tips will help you squeeze maximum value from the February campaign.
Planning Around February Promos
Icon Swaps often overlap with big content drops. Before you redeem any major fodder pack, ask yourself:
- Is a new promo team entering packs soon?
- Are there limited-time SBCs I want to complete that need high-rated fodder?
- Is the current market high or low for key positions?
It can be smart to hold your big packs until the strongest promo teams are in packs, especially during the late February window. This gives you more chances at top-tier cards, and the fodder you pull can instant-fill SBCs.
Linking Icons Into Your Squad
Icons’ unique chemistry profiles make them ideal for hybrid teams. When choosing a specific Icon reward, consider how it will help you:
- Link an off-league star into your starting XI.
- Support a new meta card you’ve packed from February promos.
- Free you from restrictive nation or league requirements for Icon Swaps objectives.
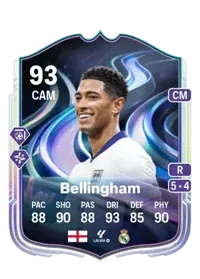
For example, a central Icon (CB, CM, CAM) with great links can unlock formation changes and hybrid squads, making it easier to satisfy even the most awkward objective requirements.
Balancing RNG vs. Certainty in Rewards
Every Icon Swaps decision boils down to risk vs. reward. Packs and Icon picks are exciting but can be disappointing if your luck is bad. Guaranteed Icons or repeatable fodder packs are more predictable.
A balanced strategy many experienced players use in February is:
- Spend a portion of your tokens on reliable fodder packs.
- Use remaining tokens on an Icon player pick that targets a position of need.
This way, you secure steady club growth while still giving yourself a shot at pulling an all-time great.
FAQ: Icon Swaps February
How many Icon Swaps tokens can I earn in February?
The exact number changes with each campaign, but it’s typically designed so you can’t get every single reward. Check the in-game objectives hub to see the current cap and plan accordingly.
What if I miss a token?
Missed tokens usually cannot be recovered later. This is why using a token tracker and logging your progress is so important. If you do miss one, re-evaluate your reward plan and adjust which SBCs you can still complete.
What is the single best Icon Swaps reward?
There is no universal best choice. For heavy grinders with deep squads, high-tier Icon picks might be ideal. For casual players or those who love SBC crafting, large fodder packs often deliver more long-term value.
When is the best time to redeem my rewards in February?
Try to time big pack redemptions with strong promo teams in packs or when you need fodder for urgent SBCs. For Icon picks, redeem when you’re ready to reshape your squad; don’t rush if you still need to complete key objectives or sort your tactics.
By combining careful token tracking, smart reward selection, and a well-funded club built around efficient coin usage, February’s Icon Swaps can dramatically upgrade your Ultimate Team. Plan ahead, stay organized, and you’ll extract maximum value from every token you earn.
-
FC 26 Path to Glory Team 1: Predicted Players, Release Date & Live Upgrade Guide (June 5, 2026)Jun 03,2026
-
FC 26 Festival of Football: Full Promo Schedule, Path to Glory & What to Expect (June–July 2026)Jun 03,2026
-
EA FC 26: Ultimate Team Token System ExplainedJun 03,2026
-
FC 26 Ultimate TOTS Upgrade SBC — Is It Worth It? Last Chance Before June 3 DeadlineJun 03,2026
-
EA FC 26 Path to Glory — World Cup Upgrade TrackerJun 02,2026
-
EA FC 26 Path to Glory: Start Date, Leaks & Best TipsJun 02,2026
-
How EA FC 27 Can Win Back Frustrated FC 26 PlayersJun 02,2026
-
EA FC 26 Meta Update: Analog Sprint, Top Formations & 500k SquadJun 02,2026
